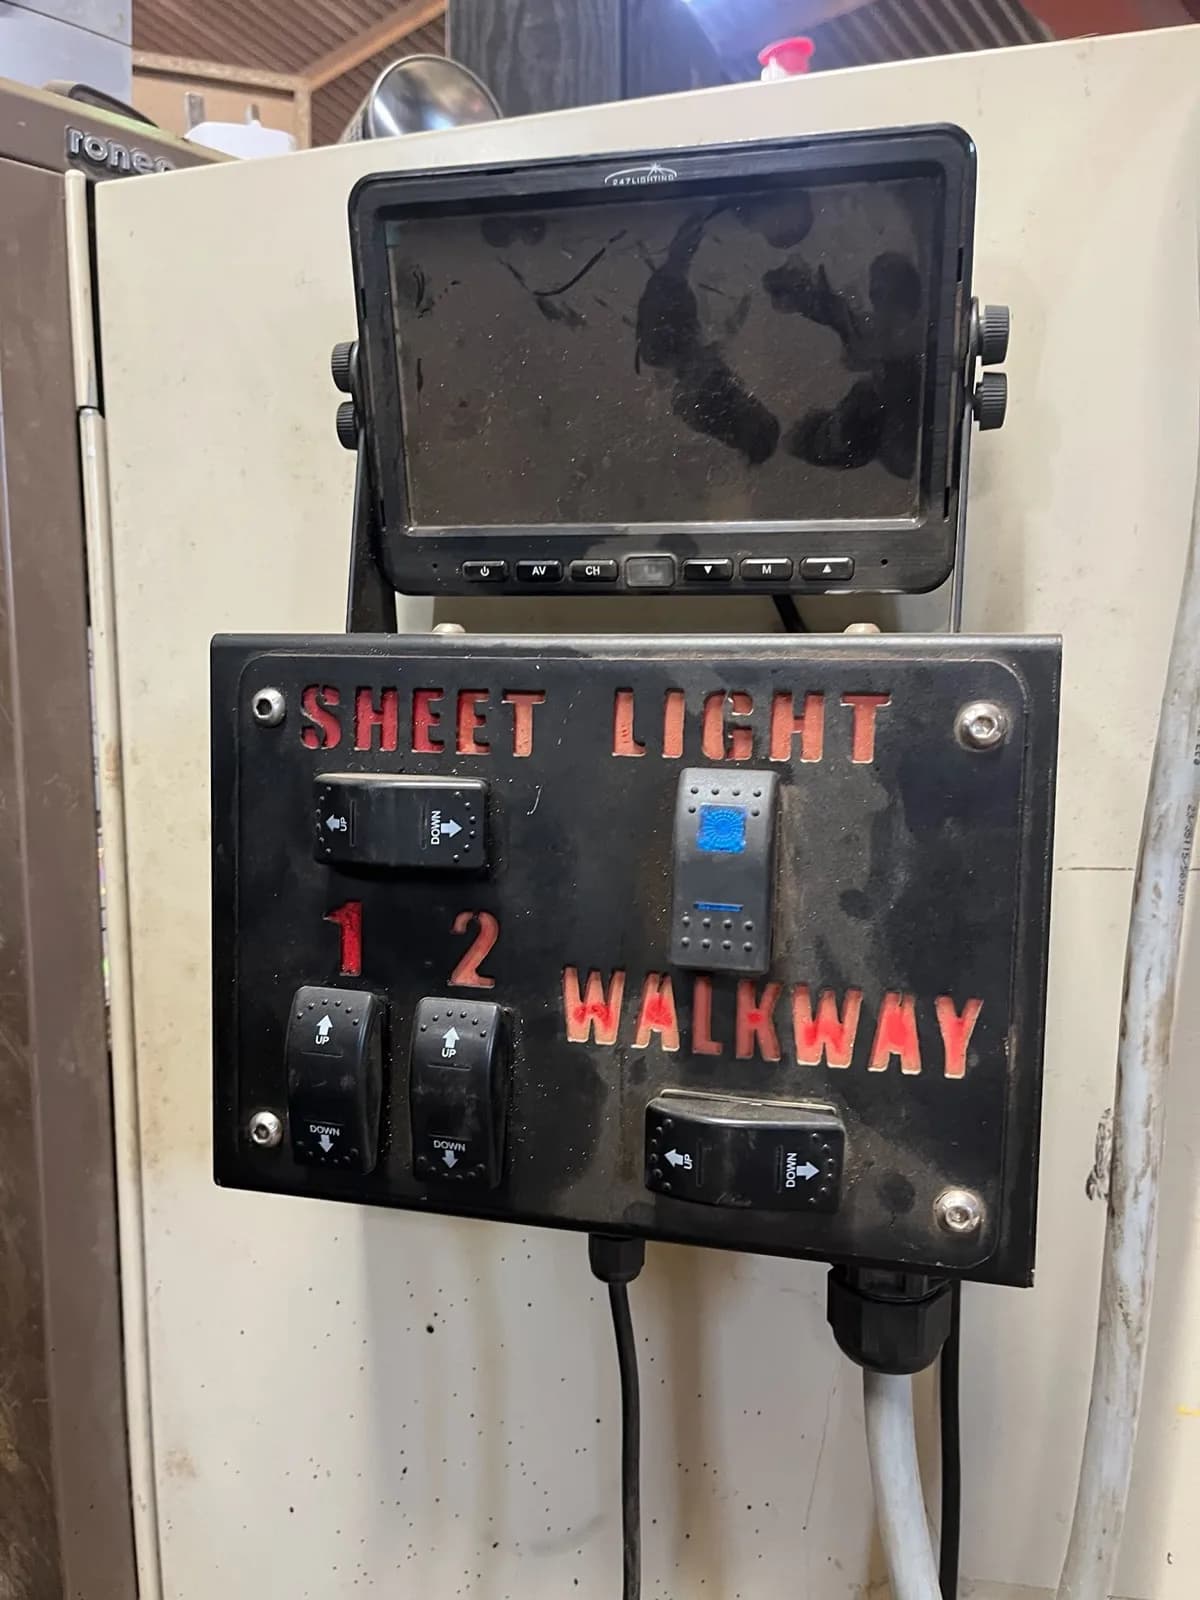
In short: ISOBUS Block replaces an old implement controller that only switches things on and off. The loads go on its relay channels, and you run them from the tractor's ISOBUS screen and AUX-N buttons. If the old controller does rate control, closed-loop regulation or section control, a relay module does not replace it.
The implement still works. Its control box does not, or not every day. A switch sticks, a board resets halfway down the field, and the only spare the dealer can find is one somebody has already repaired. Then a new tractor arrives and the old controller will not work with it at all. Here is how to decide on an implement control box replacement, and five steps from the old box to buttons on the tractor screen. The parts for this job: ISOBUS retrofit kit for an old implement.
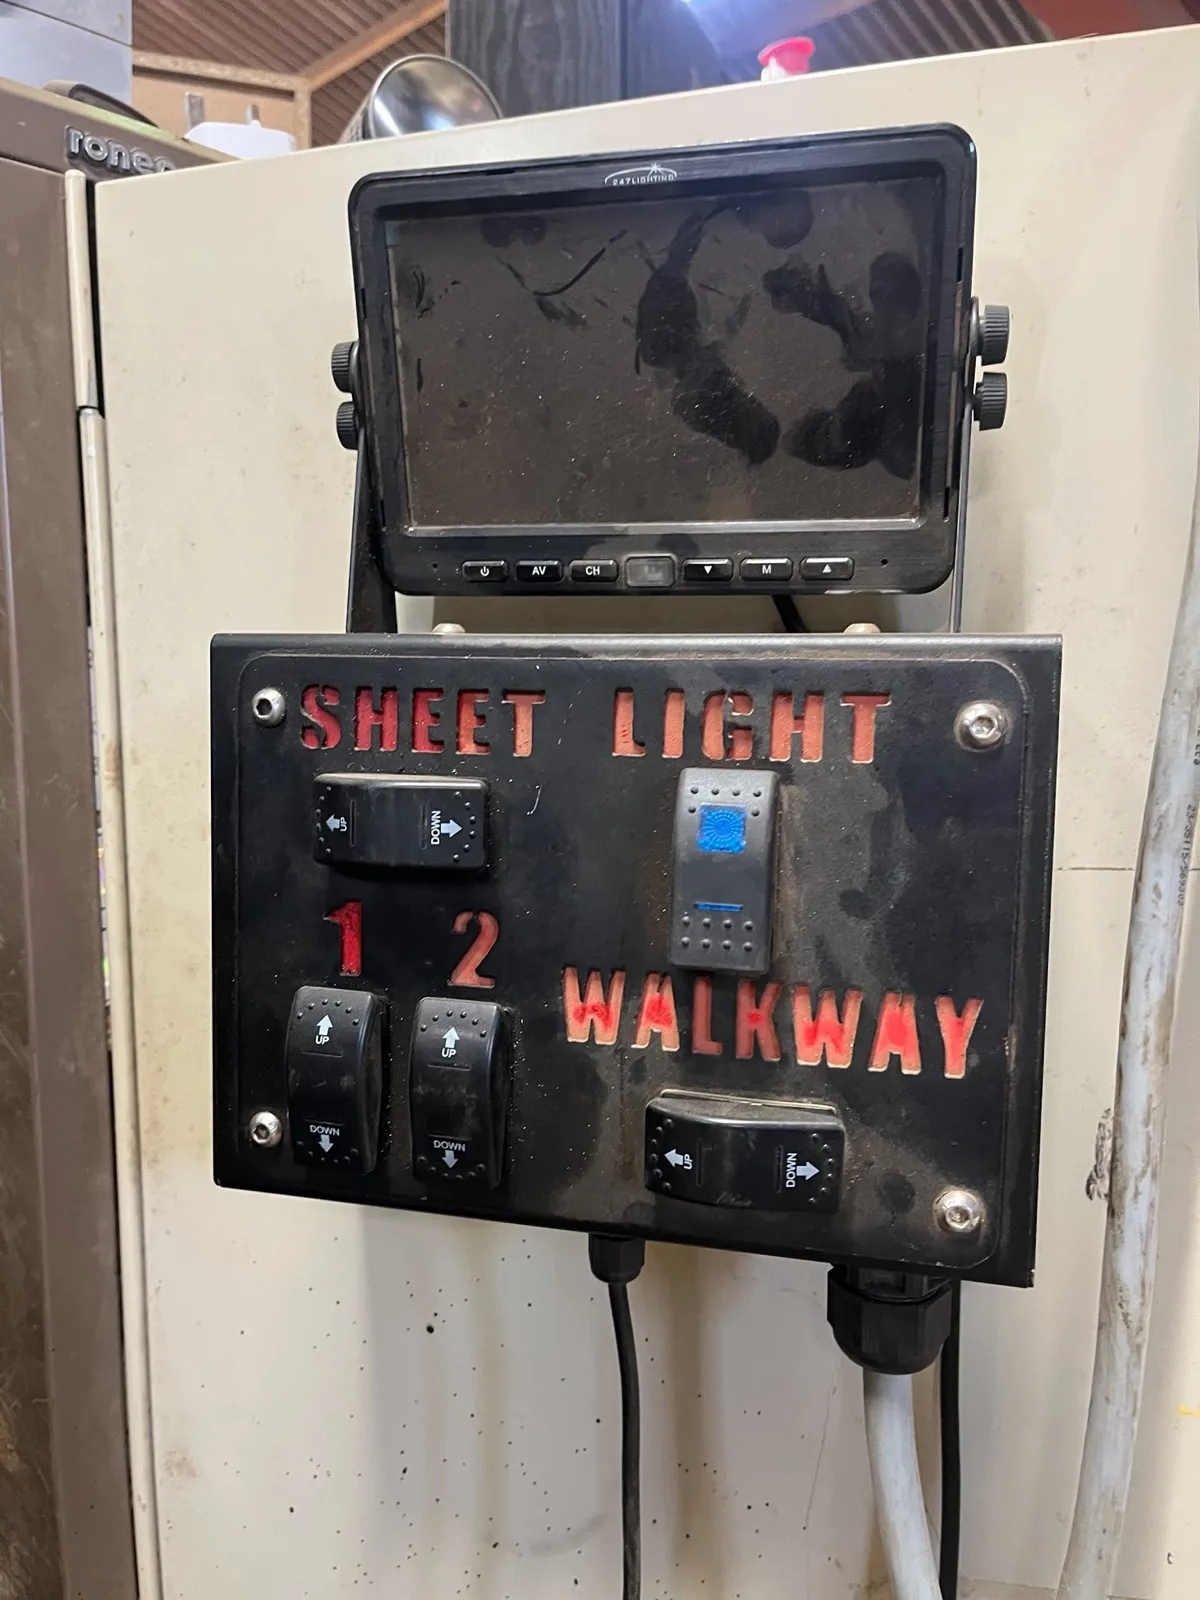
A trailer's old switch box. It was replaced with an 8-channel module on the trailer: the potato trailer story.
Repair or replace the old implement controller?
Open the box, or read its manual, and sort what it does into two piles.
| Repair or keep the old controller when | Replace the control side with ISOBUS when |
|---|---|
| It regulates something: application rate, pressure, dosing | Every function is on or off: a solenoid, a lamp, a motor, a beacon |
| It runs section control or another loop with sensors | The faults are in switches, connectors or a tired circuit board |
| A new spare part is still available | Spares are gone, or only exist as repaired units |
| The implement stays behind one tractor | The implement moves between tractors, or a new tractor is coming |
| The tractor has no ISOBUS terminal | The tractor has a Virtual Terminal and an ISOBUS socket |
Many older control boxes sit in the right-hand column: switches, perhaps a small board, and a multi-core cable to the implement. The board looks like electronics, but its job is switching coils on and off, and that job moves to ISOBUS without loss. The comparison of ISOBUS and non-ISOBUS implements explains why the old box ties the implement to one tractor.
If the box does both, split it. Keep the regulating controller for the rate. Move the plain switching (fold, lift, lights) to the tractor's buttons, the way the sprayer boom-movement setup does it.
What an ISOBUS relay module replaces, and what it does not
On an ISOBUS tractor, ISOBUS Block replaces an old implement control box that only switches loads on and off, and the box comes out of the cab. The implement's solenoid valves, work lights and beacons go on its 8 relay channels, up to 10 A each. You switch them from AUX-N buttons on the armrest or joystick, or from buttons on the Virtual Terminal (the ISOBUS screen in the cab) if your terminal has no AUX-N.
ISOBUS Block runs on any ISOBUS tractor terminal and has been manually tested on all major brands, with customers running it daily on Fendt, Valtra, John Deere, Case IH, CLAAS, New Holland and Massey Ferguson tractors and on the AmaTron 4 from Amazone, Jaltest and Arag add-on terminals.
It takes over on/off switching of solenoid valves, diverter valves, work lights, beacons, motors and pumps, as momentary (MOM) or latching (TOG) buttons. One button can switch several outputs. What it does not take over:
- Rate control and closed-loop regulation. It does not read a flow meter, drive a proportional valve or adjust a dose.
- Section control. Switching a section valve from a button is manual switching, not GPS section control. ISOBUS section control explained covers the difference.
- The old controller's own program. Sequences and interlocks programmed into the old box do not come across. The 8-channel module has digital inputs: sensors and switches wired to them can drive the relays automatically, armed from the tractor screen or a joystick button. That is not a copy of the old software.
- Hydraulics. Hoses, valve blocks and cylinders stay as they are. The relay switches the solenoid coil.
Step 1: Write down what the old box switched
Before buying anything, list every function.
- Count outputs, not switches. A double-acting valve has two solenoids, one per direction. One up/down switch on the old box therefore needs two channels.
- Current per output. Read the rating plate on each coil or lamp. Watts divided by volts gives amps: a 24 W coil on 12 V draws 2 A. Each channel switches up to 10 A. A bigger load goes through an external relay or contactor rated for it, switched by the channel.
- Voltage. The coils and lamps must match the supply that feeds the module's
COMterminals: 12 V or 24 V. - Momentary or latching. Functions you hold (lift, fold) become
MOM. Functions that stay on (lights, a pump) becomeTOG. - Wire labels. Mark every core where it leaves the old box.
Up to 8 outputs fit the 8-channel module. For more, the 32-channel module is one unit with 32 relay channels.
Step 2: Check the tractor terminal and ISOBUS socket
The new tractor needs three things:
- A Virtual Terminal. All button setup happens on that screen.
- An ISOBUS socket. The rear external socket for a module on the implement, or the in-cab socket for a module in the cab.
- AUX-N, for physical buttons. Without it, the module still runs from the screen's soft keys.
How to tell if your tractor has ISOBUS walks through each check.
Where the module goes decides the load supply. On the implement, in a weatherproof enclosure you supply, it plugs into the rear external socket and the loads run off the tractor's supply there, fused by the tractor at 60 A. In the cab, you feed the loads from a +12 V or +24 V source through your own fuse. For an implement controller, the implement mount usually fits best: the module stays with the implement.
Step 3: Plan the channels
Example: an older trailed implement whose fold and lift box has failed. Button names are up to 8 characters and appear on the screen and in the AUX-N menu.
| Button name | Channel | Load | Mode |
|---|---|---|---|
| LIFT UP | CH1 | Lift valve, solenoid A | MOM |
| LIFT DN | CH2 | Lift valve, solenoid B | MOM |
| FOLD OUT | CH3 | Fold valve, solenoid A | MOM |
| FOLD IN | CH4 | Fold valve, solenoid B | MOM |
| DIVERTER | CH5 | Diverter valve | TOG |
| LIGHTS | CH6 | Work lights | TOG |
| BEACON | CH7 | Beacon | TOG |
| (spare) | CH8 | Nothing yet |
If two loads always switch together, put both channels on one button.
Step 4: Wire the outputs
Every channel is wired the same way: supply to COM, NO to the load, load return to ground. The load wires from the old switch contacts land on the module instead.
- Mount the module in the cab, or on the implement inside a weatherproof enclosure.
- Land each labelled load wire on its planned channel.
- On a cab install, fuse your +12 V or +24 V feed to
COM. - Build the ISOBUS cable. The in-cab and external connector kits, offered as add-ons with the module, ship with loose contacts that you crimp yourself. Bare ISOBUS cable comes as an add-on too, in 3 m (10 ft), 6 m (20 ft) or 10 m (33 ft).
- Take the old box and its loom out of the cab.
The full wiring detail is in the ISOBUS retrofit guide, and the coil side in switching hydraulic solenoid valves from the terminal.
Step 5: Assign the buttons and test
- Plug in. The module appears on the Virtual Terminal.
- Press
EDIT. The buttons turn blue. Tap one, type its name, pick an icon, choose its channel or channels and setTOGorMOM. Exit edit mode to save. - Open the tractor's AUX-N menu. Your button names appear there. Assign each one to a joystick or armrest button.
- Test each button with no oil flowing, checking for voltage at the coil with a test lamp or multimeter. Then test with oil, one function at a time.
- Keep the old box on the shelf until the implement has done a full day's work.
The button setup lives in the module and comes up the same on the next tractor. AUX-N assignments are set once per tractor, as the AUX-N complete guide explains.
Setup, support and delivery
- Setup: 5 to 10 minutes on the tractor terminal, naming the buttons and picking their icons. Nothing to install on a computer.
- First use: the same day the module arrives.
- Support: on WhatsApp and by email, answered by the people who design and build the module. On WhatsApp a reply typically comes within minutes during the working day. Every message gets an answer within one business day.
- Warranty: 5 years.
- Shipping: free express shipping. Orders ship the next business day.
Frequently asked questions
How do I make an old implement work with a new tractor?
Move the implement's on/off functions to ISOBUS Block, an ISOBUS relay module mounted on the implement. One cable goes to the tractor's rear ISOBUS socket, and the buttons appear on the new tractor's screen and joystick.
What is the easiest way to replace an old implement control box?
If the box only switches loads on and off, replace it with ISOBUS Block. Each load the box switched goes on one relay channel, and you run the functions from the tractor screen, or from joystick buttons through AUX-N. This covers on/off functions only, not rate control, closed-loop regulation or section control.
Is it worth repairing an old implement controller?
Yes, if it does rate control or closed-loop regulation and a new spare still exists. If it only switches loads on and off and the only spares are repaired units, replacing the control side is the better bet.
Can a relay module replace my sprayer's rate controller?
No. A relay module switches outputs on and off. It does not regulate rate or pressure, or do section control. Keep the rate controller and move the boom movements and lights to the tractor's buttons.
What if the old control box switched more than 8 functions?
Use the 32-channel module, or an ISOBUS Block custom build: hardware delivered pre-configured for one machine, with connectors, cable lengths and button names set before it ships.
What if I get stuck during the install?
Message ISOBUS Block support on WhatsApp or by email. The people who design and build the module answer, and on WhatsApp a reply typically comes within minutes during the working day. A photo of the wiring or the screen with your question is enough to start. If your terminal ever does not show the module, we sort it out with you.
Old controller on its last repair? ISOBUS Block puts the implement's solenoids, valves and lights on 8 relay outputs, switched from your tractor's Virtual Terminal and AUX-N buttons.